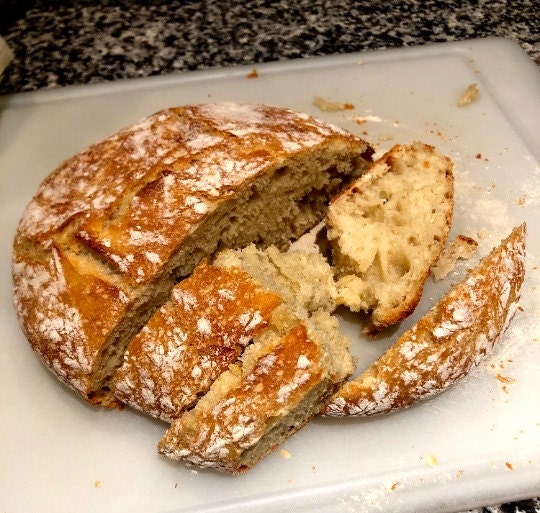
I personally love making homemade bread. The aroma in the kitchen is unparalleled, as are those first warm crusty bites.
At some point during the pandemic of 2020 when the 'bake bread at home' craze was going on, I started experimenting, looking for the perfect crusty French Bread. What I developed is a rustic recipe with the perfect crunchy outer crust. My Délicieuse Beaucoup Crusty French Bread Kit is so easy to make and is perfect for the beginner baker!
So, let's go straight into the process for making this French bread.
Easy steps
You'll fall in love with how easy it is to make my Délicieuse Beaucoup Crusty French Bread! There is some wait time to allow the yeast to render and the dough to rise, but besides that, there is little hands-on work. Step by step instructions are included, but here is some additional insider info:
WATER:
You add VERY warm water and give it a stir to activate yeast. You can use mineral water or regular tap water. Be careful not to use hot water as it will greatly diminish the yeast's strength or kill it altogether and the bread won't rise. Your water should be tepid in temperature. A note on tepid water…I always say you will want your water more on the very warm side as when you pour it into the bowl, it will cool slightly to the perfect “tepid” temperature. If that seems too confusing, simply use a cooking thermometer and the water should be at 110º.
MIXING:
I used a stand mixer with the bread hook attached when creating this mix, but it's not a necessary appliance for this recipe. You can mix by hand or with a spoon. If using your hands to mix the dough, you may wish to lightly oil your hands with vegetable or olive oil so the dough doesn’t stick to your fingers. Then you will let it rise for 1 hour.
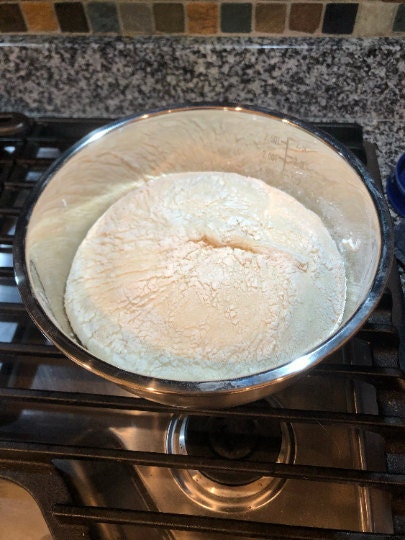
FORMING THE LOAF:
The dough will be very “airy”, sticky, and difficult to handle at this point. Using your fingers, you will fold outer edges in towards the center, rotating the dough until a ball begins to form. You will flip the dough ball over, place hands on both sides of dough and rotate your hands in a twisting motion and pull towards you to shape.
SCORING: this refers to the slits that are made on top of the loaf right before it goes into the oven. This helps the bread to rise evenly. Use a lame (a stick with a blade that can be bought online) or a very sharp knife. Don't be tempted to make very deep slits because they will blossom too much during baking. I typically make one or two long “surface” slits.
BAKING THE BREAD:
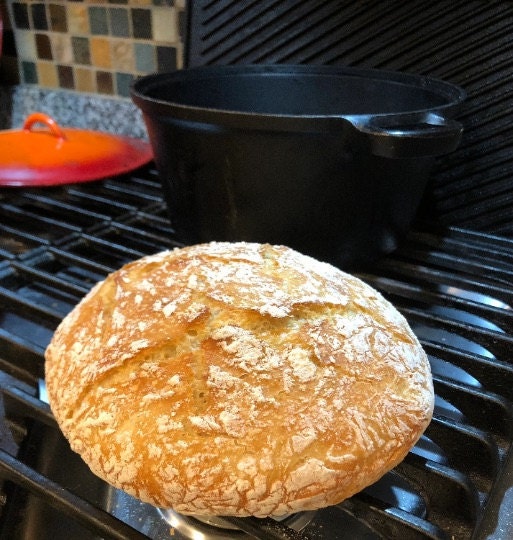
Oven: this is where the magic happens and it's imperative to place an empty round Dutch oven with the lid on in the oven and preheat to 425°. You will set a 30 minute timer and once your timer is up, you will remove your Dutch oven and remove the lid. Then you will lift the dough ball out of the mixing bowl and place it in the bottom of the Dutch oven. Simply replace the lid and bake for 30 minutes, then remove lid and bake another 20 min. This is what creates that fabulous crackly crust that we all love!
When is it done? The bread will turn a golden brown and the slits will open.

What is the difference between French bread and baguette? They are both the same. A baguette is French bread shaped like a stick, long and thin, and also the name used for this type of bread in France.
Can Délicieuse Beaucoup Crusty French French bread be frozen? Absolutely! And I recommend doing so if you are not going to eat in the first hours of making it as French Bread can harden or become too chewy after sitting out. You can reheat from a frozen state in a 325º oven.
That’s it! Fresh, delicious, AUTHENTIC crusty French bread in less than 2 hours! I hope you will try this mix and post your comments and pictures below!
Enjoy!